There is nothing more aggravating than receiving a highly anticipated collection piece, only to find it damaged or ruined due to the seller’s lackluster shipping.
If you’ve never dealt with this yourself, it’s hard to describe how devastating it can be, especially when it happens with an item that has eluded you for a long time.
I’ve experienced this for myself several times, and I can tell you it never gets easier to deal with or any less infuriating.
With that in mind, I figured I should publish an article depicting some of the experiences I’ve had with sellers and couriers who just don’t seem to care about the quality of their shipping.
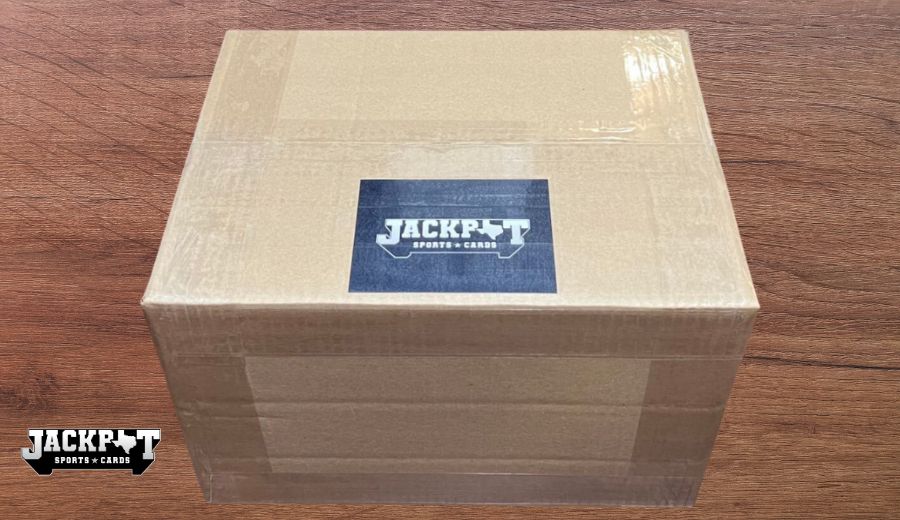
More importantly, I want to take this opportunity to highlight why proper shipping practices are so important, and set an example by offering a tutorial on how we ship our orders here at Jackpot Sports Cards, so people who are planning to ship these items themselves will understand how to do it right.
So, if you’re searching for the best way to ship trading cards, or just want to learn how to ship trading cards the right way, then you’re definitely going to want to keep reading.
Because in this article, I’m going to explore some of the worst examples of improper shipping I’ve ever experienced, and explain how to ship trading cards by offering step-by-step instructions on how we package our shipments, so you can start shipping your products like a pro.
How to Ship Trading Cards in the Worst Way Possible
Most collectors have their own personal horror stories when it comes to bad shipping experiences, and even if these things didn’t happen to you, hearing these stories can be absolutely gut-wrenching.
The worst example of this that I’ve dealt with personally happened a couple of years ago when I opened a large shipment I ordered from an industry mainstay (who will remain unnamed).
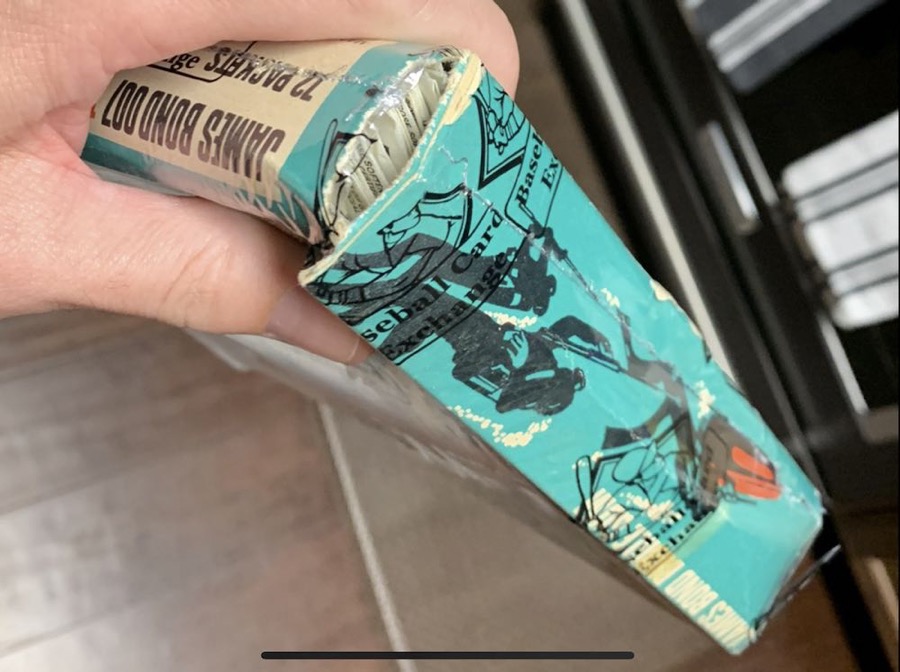
There were several products in that order, with the most valuable, unique, and delicate item being a 1966 Somportex James Bond 007 unopened wax box.
The least valuable product in that order (which also happened to be the heaviest and bulkiest) was a six-count sealed case of 1980 Topps Superman II rack pack boxes.
When I opened the package, my jaw hit the floor, as I found the ultra rare James Bond box at the very bottom of the parcel, with only one thin sheet of bubble wrap between it and the extremely heavy and bulky Superman II case that had been placed on top.
Needless to say, the high-end 007 box was severely damaged. In fact, it was crushed so badly that the box itself had split at all four corners, and as you can see from the image below, the packs within the box were trying to escape through the tension holes caused by the weight of the Superman II case.
Fortunately, the seller had cameras that monitored the quality (or lack thereof) of their shipping department, and financially, I was treated extremely fairly and was compensated in a timely manner.
But my most coveted item from that purchase had to be returned, rendering the emotional aspect of the transaction extremely unsatisfying.
Another shipping memory that I will never forget happened when I was at the Dallas Card Show in Allen, Texas a few years ago, and had to watch in horror as a driver from one of the largest United States ground carriers threw 30-40 packages from his vehicle as high as 8-12 feet in the air, and then cringe as I witnessed each one of them land with a thud on the concrete below.
I remember taking video of it, but I’ve yet to be able to locate it. As painful as that memory is, I hope I can find it because I would love to post it on our social media accounts just to stress how important it is for sellers to ship with care and ship with pride!
How to Ship Trading Cards the Right Way
Regardless of what kind of cards you’re shipping, the best way to ship trading cards is to send out your orders with the same level of care that you’d expect a seller to use when shipping your orders. Anything less is incredibly disrespectful and unprofessional.
That being said, the bad experiences I’ve had with shipping have only further entrenched my belief that you should ship items to others in the way you’d want them to ship them to you.
At the same time, these incidents have inspired me and everyone else here at Jackpot Sports Cards to adhere to some very strict packaging procedures.
Needless to say, we take pride in our shipping, and we hope you do, too!
With that in mind, I’m going to walk you through the packaging process for one of our orders from start to finish, so you can join us in our efforts to raise the standards of what should be expected from a sports card shipper.
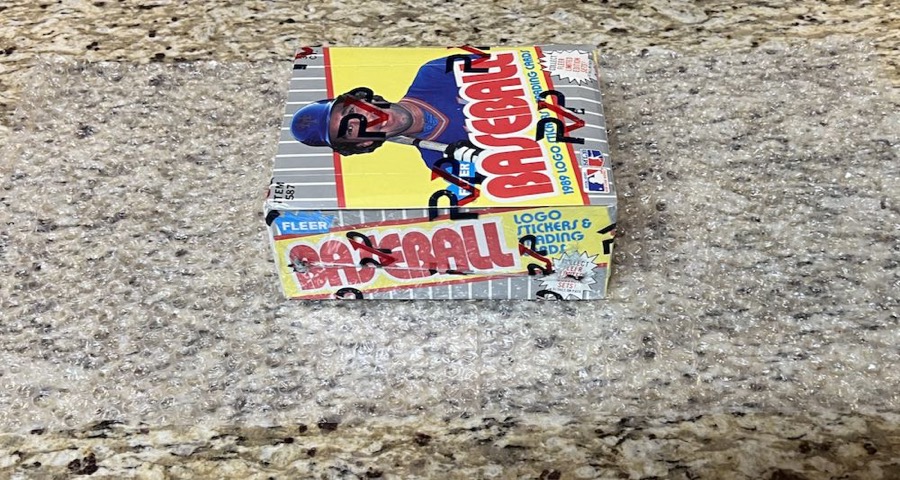
For this order, we will be packaging and shipping an RVP-authenticated 1989 Fleer Baseball unopened wax box.
Placement
To start, I’ve placed two non-perforated bubble wrap sheets under the wax box with the top of the wax box pointing left and the bottom of the wax box pointing right, as you can see in the image below.
Bubble Wrapping
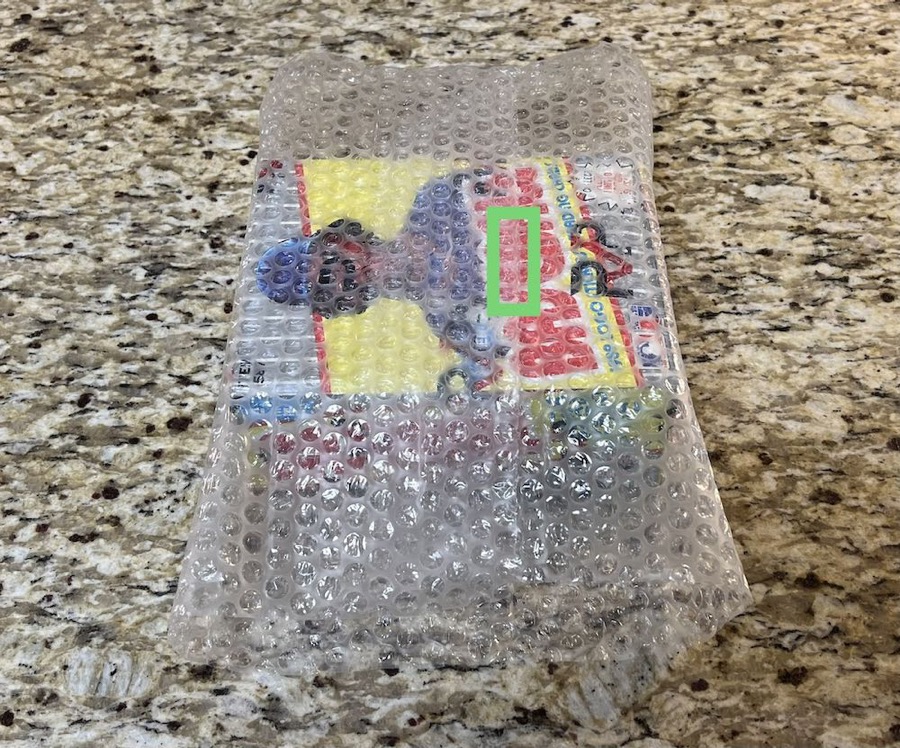
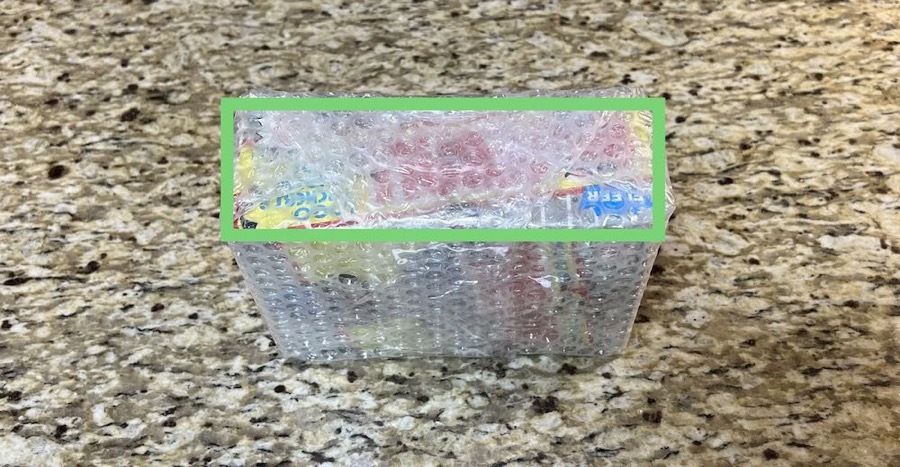
Next, pull the bubble wrap together from each side until a small amount of tension is felt in the middle of the front of the wax box, and tape the bubble wrap together in the green area shown in the image below. Please note that shipping tape is highly recommended, as opposed to Scotch or packing tape.
Then fold the bubble wrap on each side of the wax box as if you were wrapping a present, and tape a complete rectangle around all four sides, as shown in the green area in the image below.
Inner Box
Now it’s time to place the bubble-wrapped wax box inside another cardboard box, which will serve as double protection within the actual shipping box.
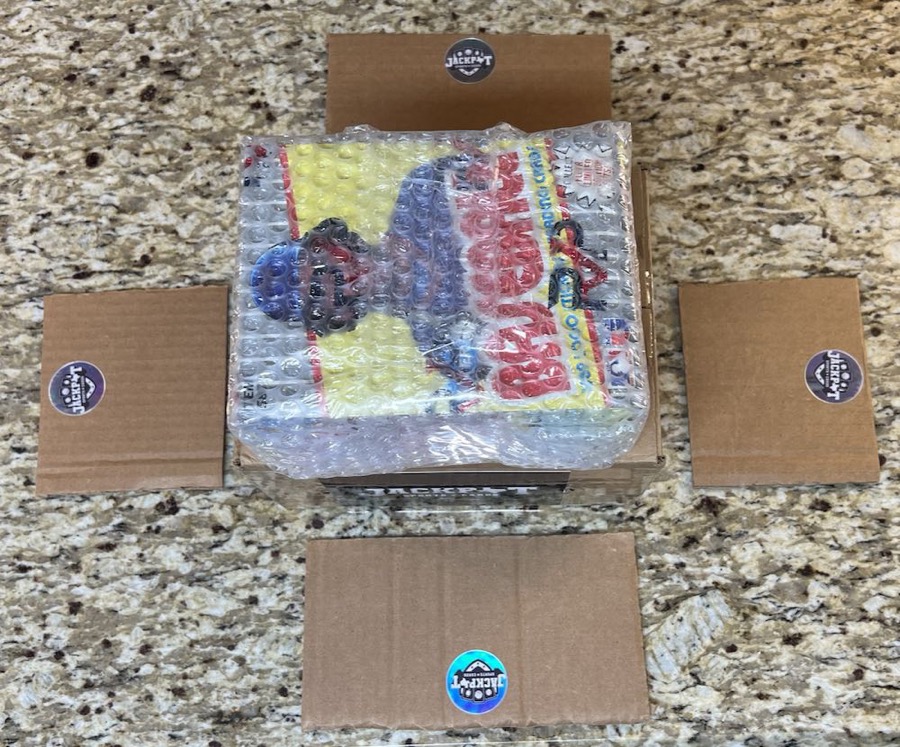
In the first image shown below you will see the wax box temporarily sitting on top of the cardboard box, so that additional protective inner walls can be measured and cut.
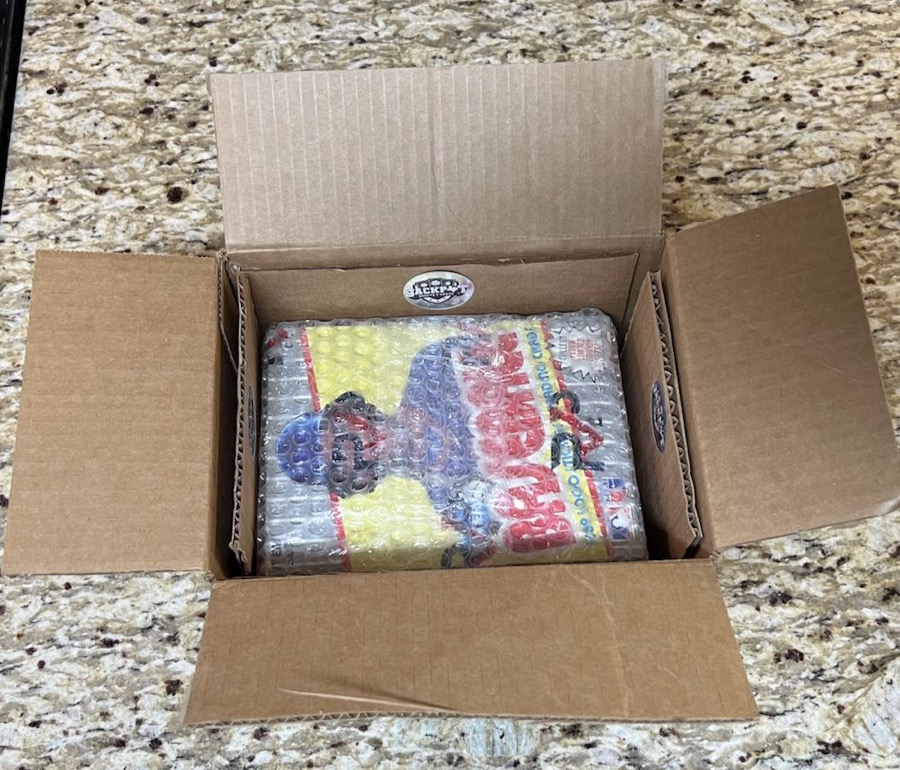
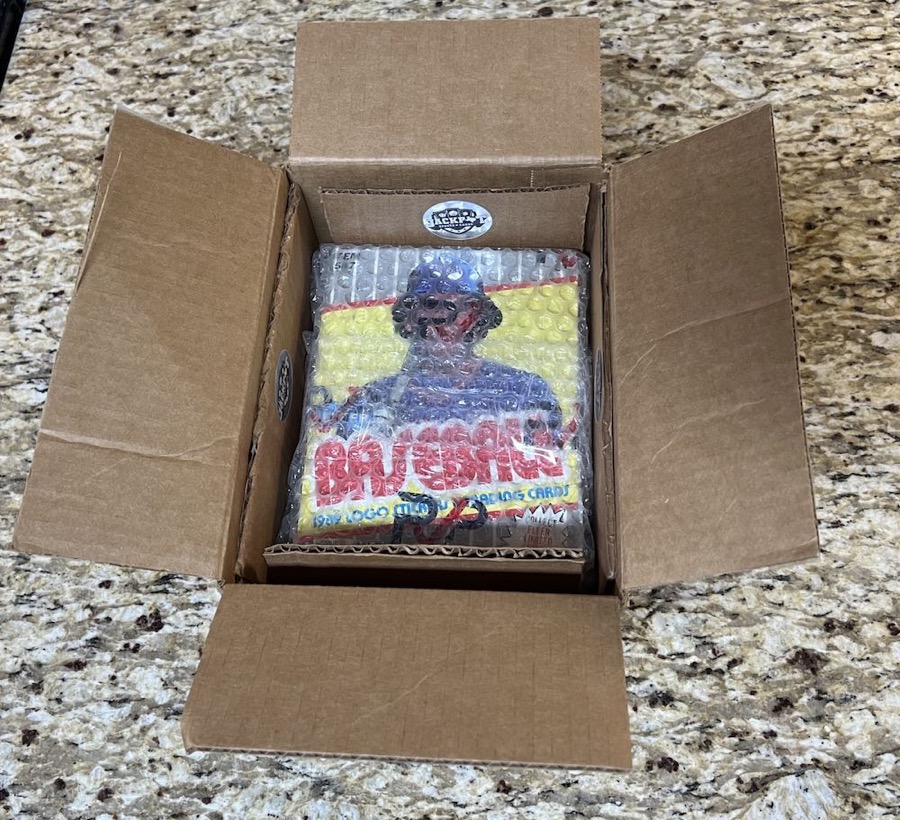
The second and third pictures show how the wax box fits nicely within the cardboard box, and how the additional protective inner walls have been slid in between the four sides of the wax box and the four inside walls of the protective cardboard box.
Filling the Space
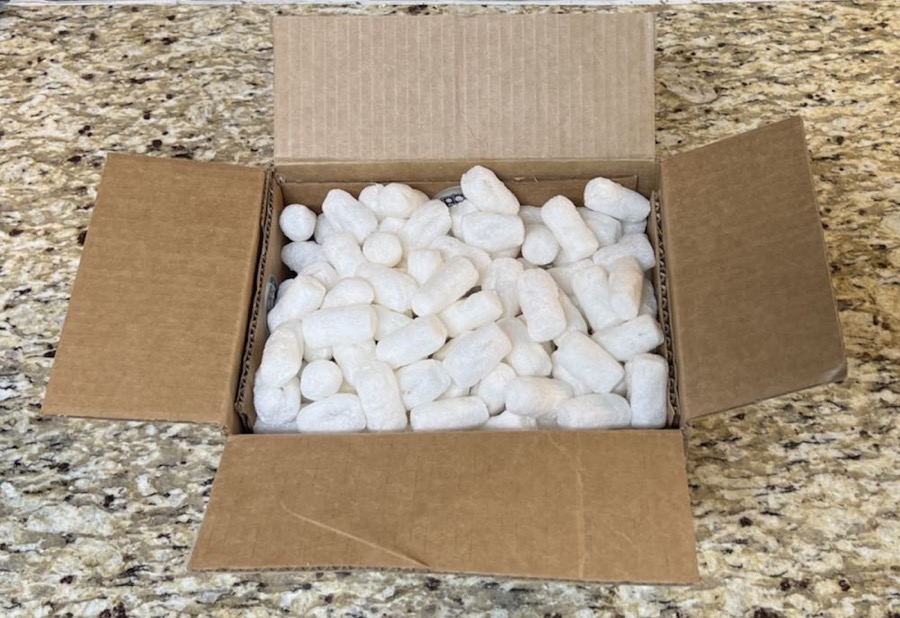
The next step is simply to fill any open space above the wax box, or around the perimeter of it, with foam or starch packing peanuts, as you’ll see in the image below. Additional bubble wrap or other soft materials can be used, but packing peanuts are preferred.
Closing the Inner Box
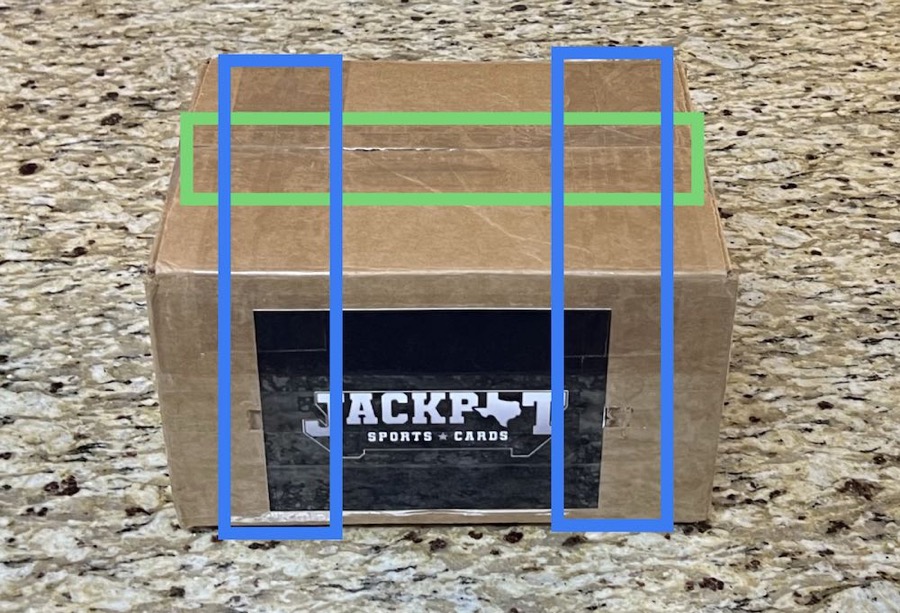
At this point, we’re ready to tape the cardboard box that the wax box has been secured in.
Here at Jackpot Sports Cards, we typically tape the top and bottom (left to right) three complete times, as you’ll see in the green area of the image below, and then we make two complete rotations on each side of the cardboard box, which you’ll see in the blue area.
Rainproofing
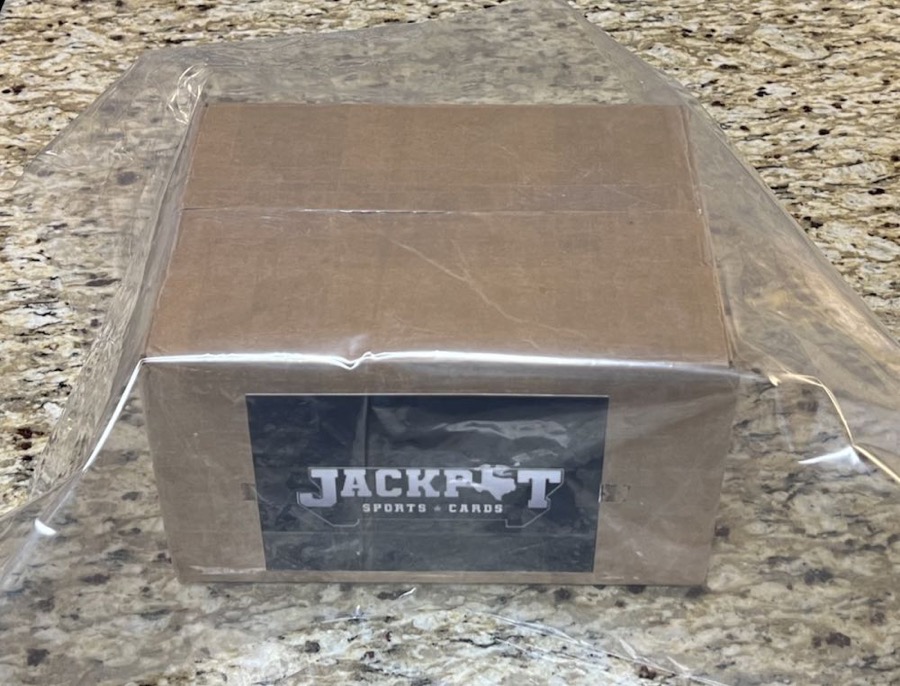
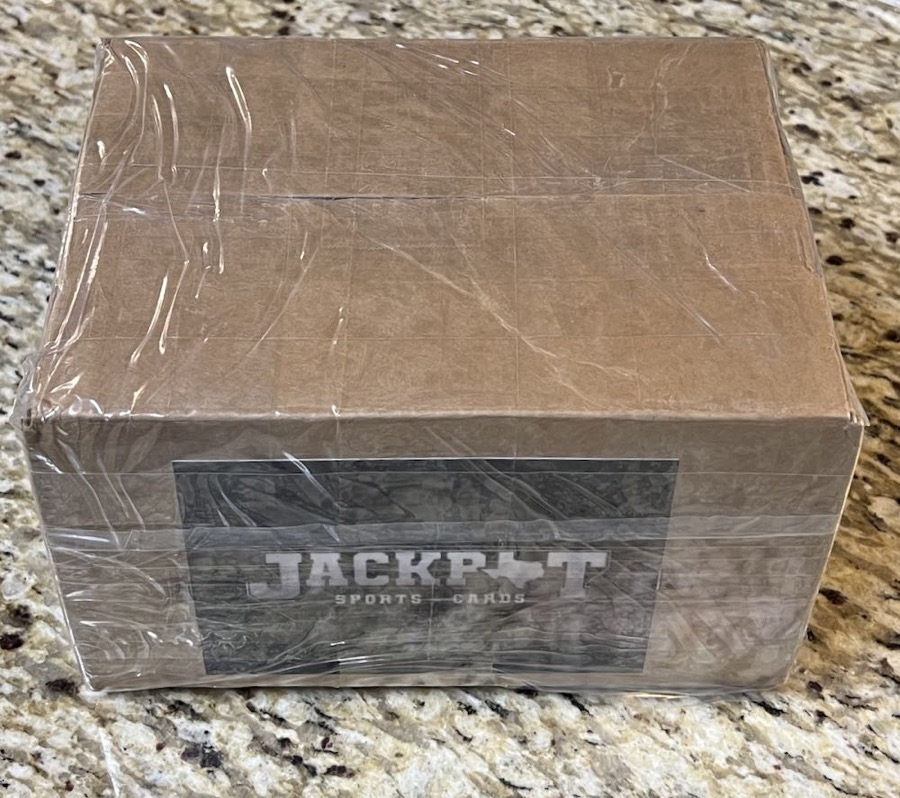
Up next is one of the most important aspects of the entire shipping process, as we do our best to “rainproof” the contents of the box.
Place the cardboard box into a large poly bag (Ziploc bags work well, too) and then squeeze all of the excess air out, and tape it continuously to ensure that the entire box is covered, as shown in the pictures below.
I cannot stress enough how important this step is, as packages often get left out in the rain, and this simple step can save the day.
Outer Box
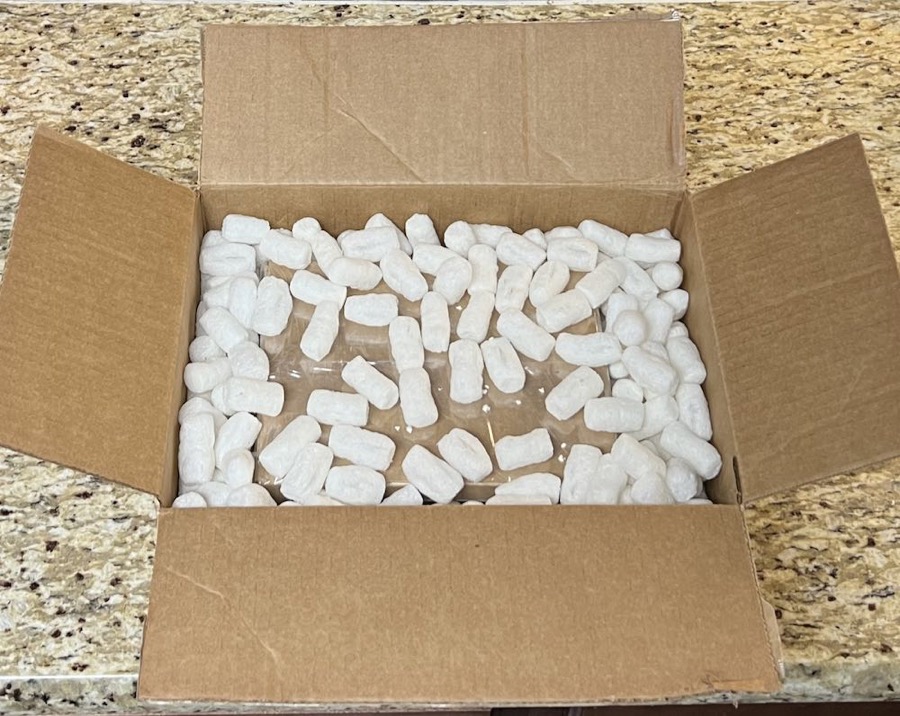
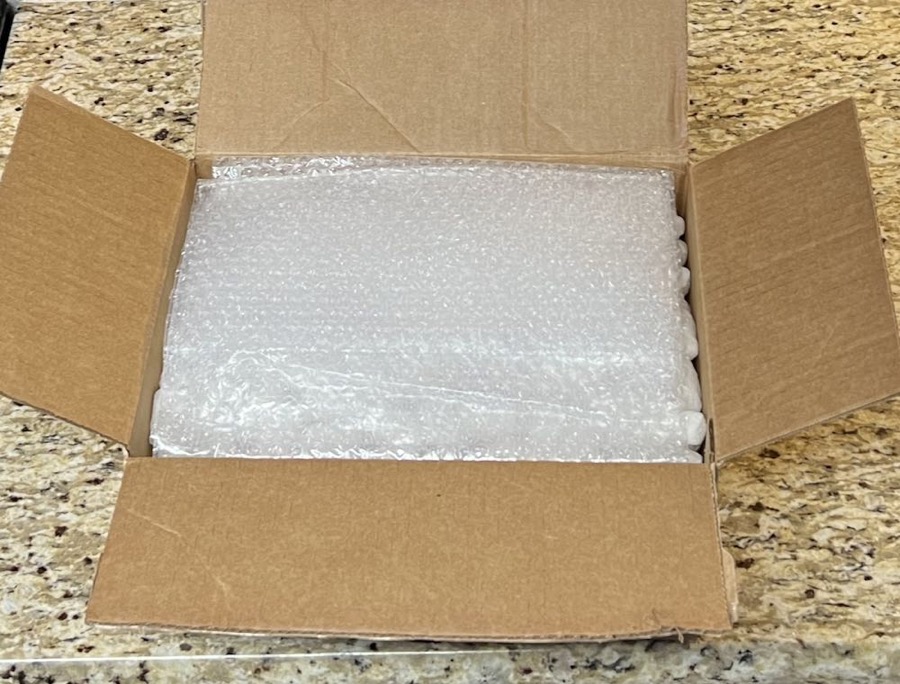
Now it’s time to place the “rainproofed” inner box into the outer box, or “shipping box” as we like to call it, and again, use packing peanuts to fill any open space above the inner box, and around the perimeter of it, before adding a few final layers of bubble wrap on top of the packing peanuts to minimize any movement from inside the outer box, as you can see in the images below.
Closing the Outer Box
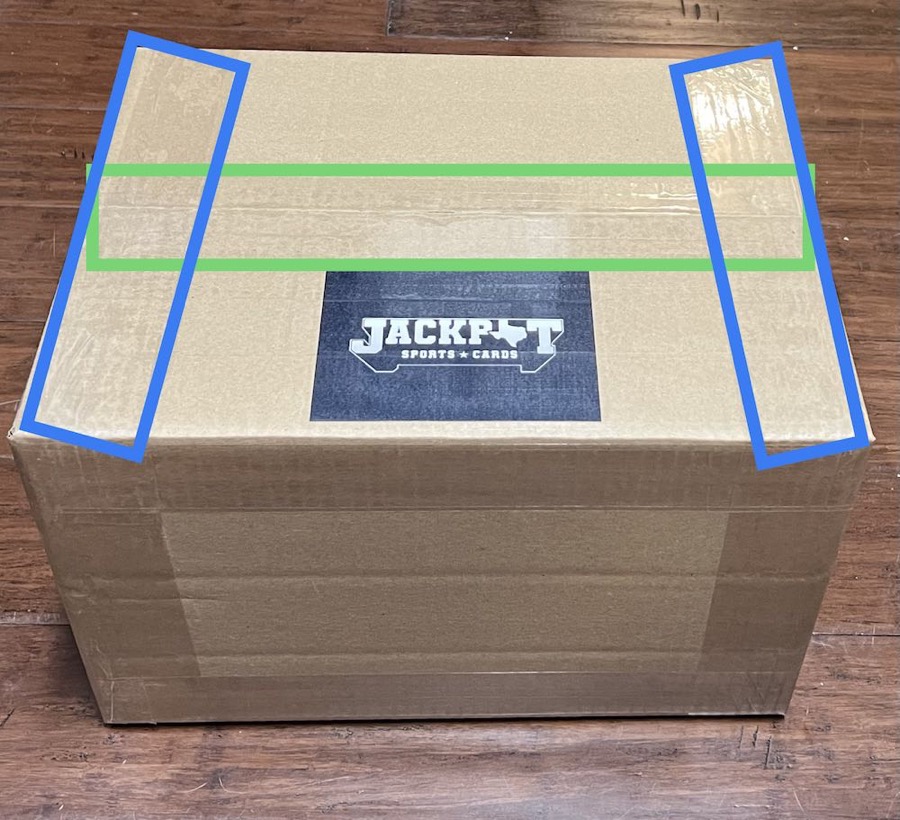
At this point, it’s time to close the outer box. Here at Jackpot Sports Cards, we typically tape the top and bottom (left to right) three complete times, as you’ll see in the green area in the image below.
Then, we do two complete rotations on each side of the box, as you’ll see in the blue area.
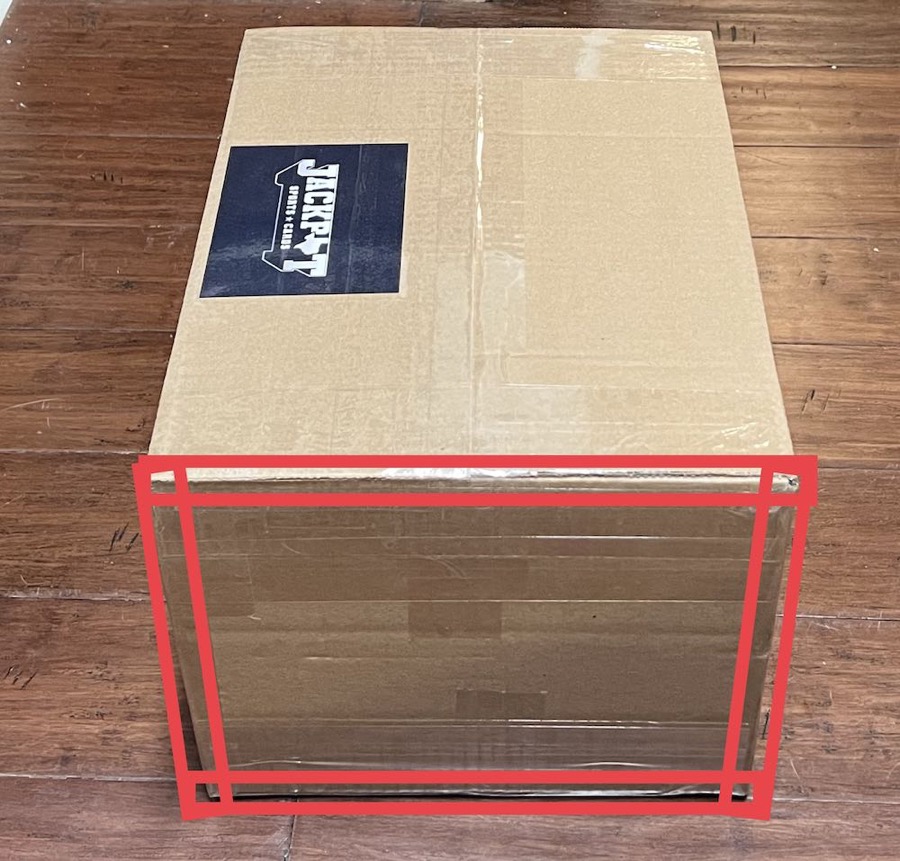
In addition, each end of the shipping box should also have a complete rotation of tape (tightly pressed) to seal any openings where the top lids or bottom lids fold in together, as you can see in the red areas in the picture below.
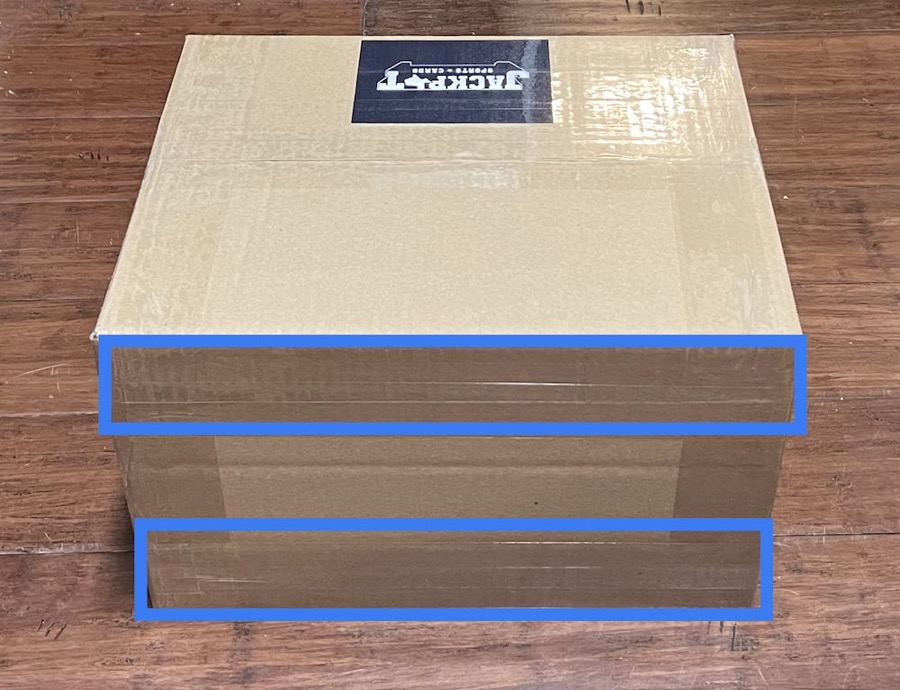
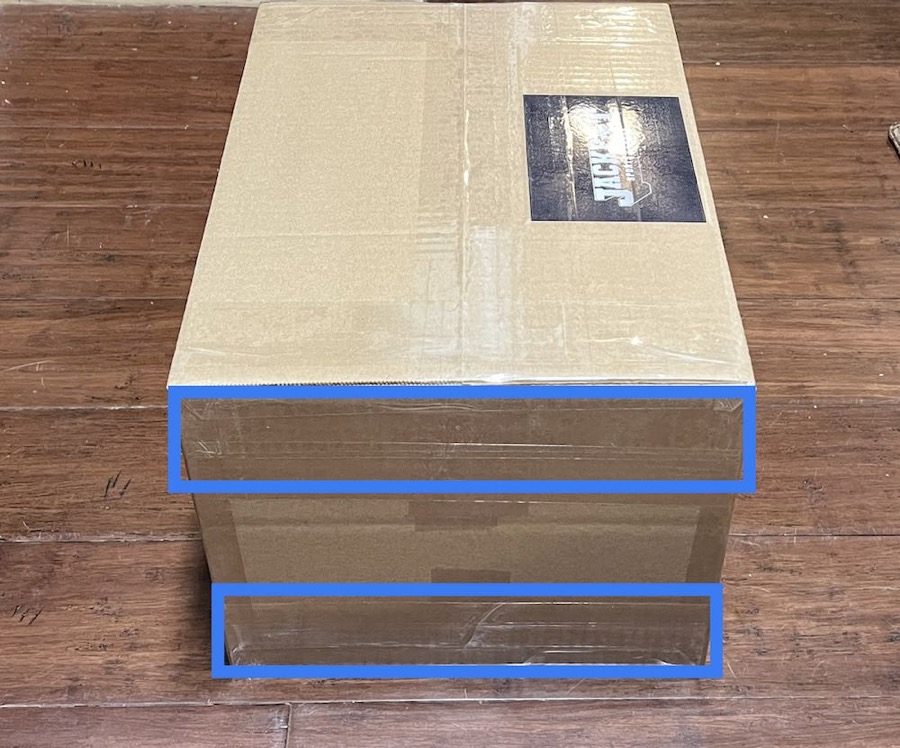
Finally, using the tape, you should make full rotations around the entire circumference of the shipping box to secure the seals made in the image above, as you can see in the blue areas in the pictures below.
This will give all of the outer walls of the shipping box more stability and prevent outer wall collapse.
Back Patting
After going through all of these steps, you’ll know how to provide the best possible packaging when shipping your orders, and be able to do everything you possibly can to ensure your shipments arrive in perfect condition.
Unfortunately, this can’t stop couriers from throwing your boxes around, but when you go above and beyond like this, the items should arrive unscathed, even if they end up getting tossed out of the back of a truck.
Now, go ahead and breathe a sigh of relief, pat yourself on the back, and don’t forget to add your shipping label!
Looking to add some items to your inventory, and have peace of mind knowing they’ll be shipped with the best possible packaging? We offer some of the most secure shipping in the industry, so why not have a look at our online store?
